Project #1- Large hanging "Thankful" sign
You can find the project and printables for the letters here: DIY Thankful Photo Board
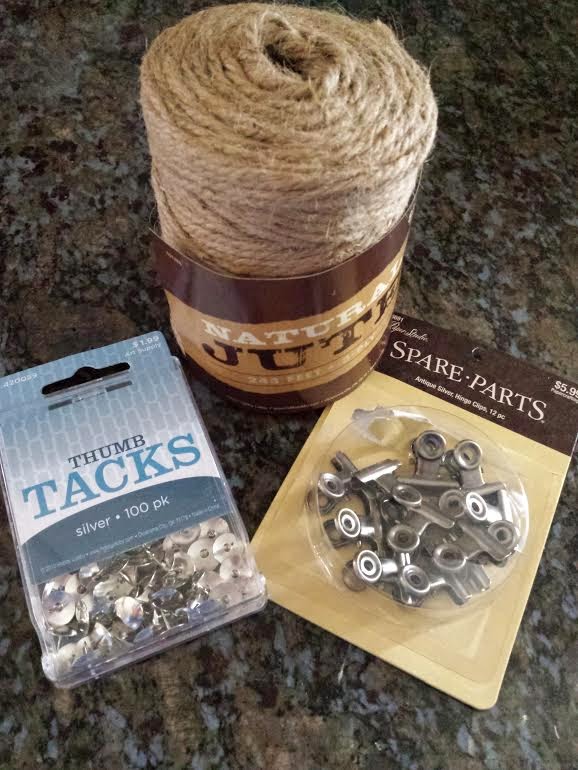
I used a 1X8 piece of wood 36" long and stained it a darker color. I also picked up some strong twine, decorative nail heads (or thumb tacks), and some clips at Hobby Lobby. These supplies at Hobby Lobby cost me around $9.00 (some items were 50% off). The twine and tacks were plenty to make multiple signs. The clips allowed me to make two signs with 6 clips on each sign to hold pictures.
After staining the wood and allowing it to dry for at least 24 hours, I printed out the letters on my computer and cut them out. I then attached them to the piece of wood with a tack in each corner of each letter.
After I had all the letters placed I worked on attaching the clips. Shanty-2-Chic used gel Gorilla glue to the hold the clips in place. However, I wanted to make sure they stayed in place. Since my clips had little holes in them I used a nail and a punch to hammer them into the wood. I placed the clips evenly underneath or between the letters.
I then drilled a hole above the letter "H" and the letter "U". I strung the twine through the hole and tied a knot. Hang on the wall and attach pictures with the clips! It really was not that difficult and inexpensive.
Project #2- Photo block
You can find the project details here: Photo display block Printables are included.
I used a 2X6X8 piece of board and cut it down to 12". I ended up making three of these. I stained the blocks a dark color. I bought swirly ornament hooks at Hobby Lobby. They were 50% off so they only cost $2.00.
Let the stain completely dry on the block (about 24 hours). If you don't let it dry all the way it will warp the paper once you attach it. I printed out the sayings I wanted from the website and attached them tacks in each corner
. I used the same tacks from the previous project. After attaching the saying to the block I drilled four very small holes in the top of the block. I them straightened out the end of four hooks. I used gel Gorilla glue on the end of the hook and stuck it in the holes I drilled. I let the glue dry and then stuck pictures on the hooks.
A cute project for under $5!
********
I also made a few hand scrubs. I love to do these and even make them often for myself. They are called "Pomegranate Hand Scrubs"
I use a small mason jar with 3/4 full of sugar and 1/4 filled with Dawn Olay Hand Renewal Pomegranate dish soap. Mix well and enjoy the beautiful smell the next time you scrub your hands. It also leaves them soft and smooth. I bought lids for the jars at Hobby Lobby so I could write out the name on the top. I also used twine from my first project to tie a bow around the jar. Since I already had a stockpile of jars and sugar at home I only bought the dish soap and labels for a total of around $6.00.
Now, I think I have to start thinking of more projects to take on. I had a lot of fun with these DIY projects. I am also working on refinishing an old wood side table my mom gave me to put in our master bedroom next to our couch so that I have a reading area- just for me. More on that when it is complete!


